


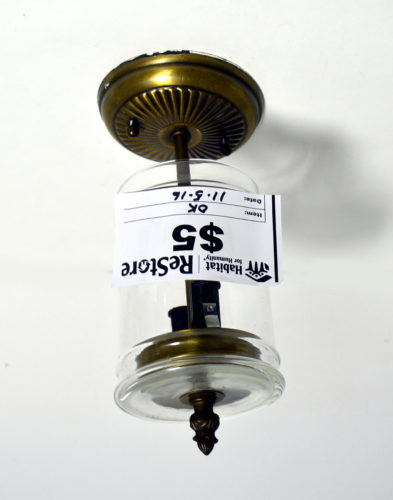
Lilly and I were looking through our local Habitat For Humanity Re-Store lighting section when I saw a ceiling light fixture sitting upside down on the shelf. It immediately struck my eye as being “right side up,” and just as quickly, the idea came to me to make a table lamp from it.
Table of Contents
Picture it hanging from the ceiling

Please note that I am not a certified electrician and working with electricity is not something to guess about. While I am comfortable taking on lighting projects, I always respect what I don’t know and double-check that I’m doing it right. As I explain how this lamp was built, I will also offer equivalent options that may be more fitting for someone with less technical experience.
Please know that some links in this post are affiliate links. If you click on a link and make a purchase, I will receive a small commission with no extra cost to you. Thank you.
How to Make a Table Lamp from a Ceiling Fixture
Materials Used
- Ceiling Light Fixture (thrift store find)
- Sandpaper
- Wood Conditioner
- Red Oak Wood Stain
- Satin Polycrylic
- Blue Thread Lock (like this)
- 18-gauge wire (like this)
- 3/16″ Heat-Shrink Tubing
- On/Off Switch (like this)
- Brown extension cord (like this) or Lamp cord with plug
- Solder & Flux
Tools Used
- Drills & Bits
- Palm Sander
- Clamps
- Dremel Rotary Tool
- Wire Strippers (I use this)
- Soldering Iron (I use this)
- Helping Hands Tool (like this)
How to Make a Table Lamp from a Ceiling Fixture
Lamp Base
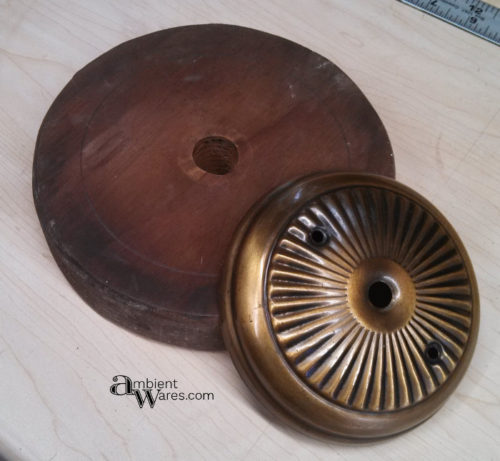
I thought the light fixture had a Victorian/elegant/steampunk-ish feel to it and I wanted to enhance that style a bit more. Since it was originally intended to be mounted on a ceiling electrical box and I wanted to make it a table lamp, it needed a suitable base. One of the leftover wheels from the wagon transformation was the perfect size.

The edges of the wheel were rough and worn from use. Starting with some 60-grit sandpaper on the palm sander, I rounded the edges even, finishing it smooth with 220 grit.
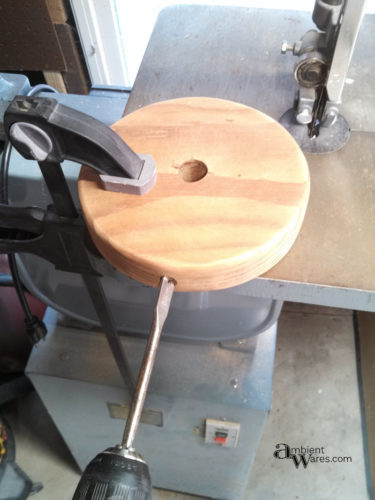
The hole in the center where the axle went was already the perfect size but I needed a new hole to run the cord through to that center hole. I clamped the wood to a secure surface and, using a 1/2″ bit, drilled through the side of the wheel to the center. A steady hand is necessary.

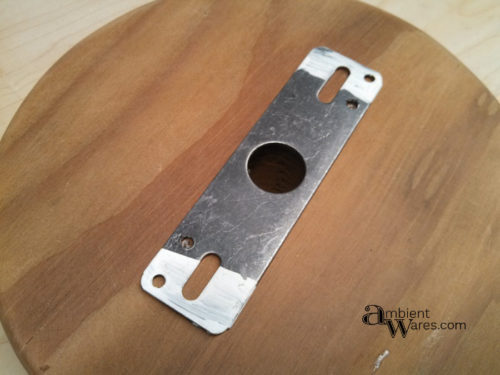
I needed a way to mount the light fixture base to the wood base and luckily the original mounting hardware was included. The mounting bar has long slots that will attach it to the wood (originally to the ceiling electrical box) and two threaded holes where the fixture nuts attach. I centered the bar on the wood and marked all 4 holes.

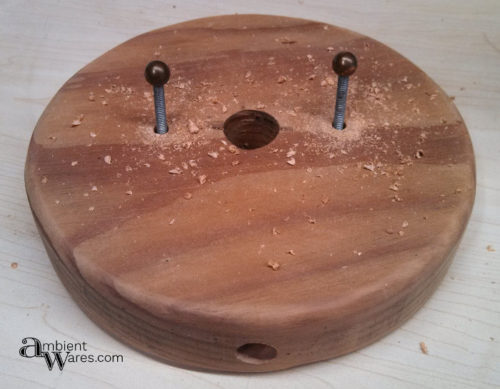
The fixture nuts are long threaded posts that can be adjusted depending on the needed height for mounting to a ceiling. This leaves a lot of excess length, so I drilled an inch deep into the wood to allow the threaded post to go down far enough when screwed into the mounting bar.

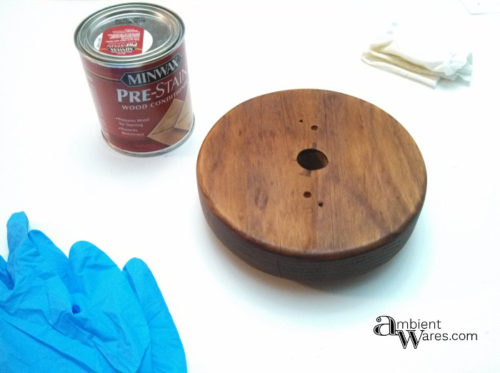
Now the base is ready for staining. First, I used a pre-sit conditioner and waited the recommended time. Next, I did 3 coats of Red Oak stain and finally clear-coated it with Polycrylic in a satin finish. While the stain and clear coat were drying, I worked on the switch for the lamp’s base.

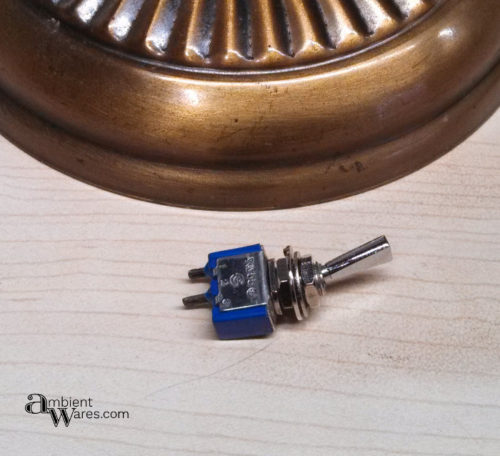
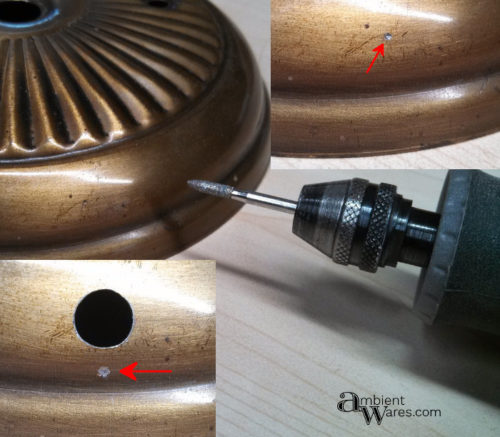
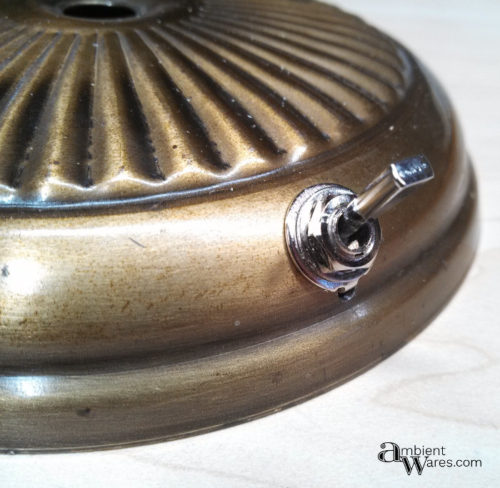
The switch I used has been floating around in my electrical parts drawer for years, waiting to be used. It’s a simple on/off toggle switch similar to this one but mine did not come with the pre-attached wires. It’s important to check the electrical rating written on the switch to ensure it will work for the project, and this one exceeded my needed ratings. I decided to put the switch front and center on the curved edge of the base.

First, I used a diamond tip Dremel bit to mark the spot where I wanted the hole. It can be difficult to drill straight/steady on metal, and the curved edge makes it even harder. The indent created by the Dremel gives the drill bit a place to steady itself when starting. This switch also has a special washer with a tab that helps keep it from spinning freely when mounted, so I marked another spot with the Dremel below the main hole and drilled it out. The tab would then rest in the smaller hole.


The external lamp cord is a brown extension cord like this. I measured 6 1/2′ from the plug, cut the wires, and stripped the ends with wire strippers. The wire was fed through the hole on the side of the wood base and pulled up through the center hole.

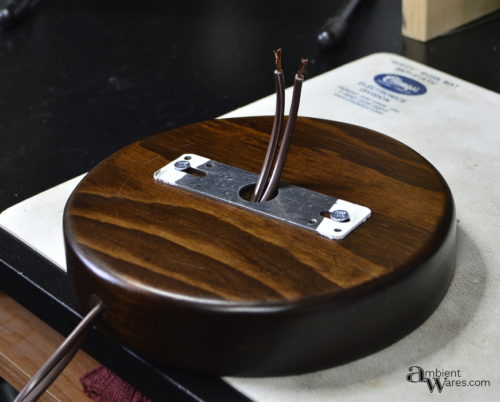
We only need a few inches of the plug wire for inside the base and we need to secure the cord so it cannot be pulled out of the fixture. I tied a special knot in the cord called the Underwriter’s Knot to keep the cord secure and the lamp’s internals safe in case the cord is yanked somehow.
Bulb Socket Refurbishing
As I began to do the lamp wiring, I could see the original wires were old and rough-looking. The insulation around the copper was cracked from age. Heat and cold had taken their toll. Looking closely at where the wires go through the socket, I noticed you could see the copper. That’s no good and downright dangerous!
The sockets are sealed shut with a rivet, preventing easy replacement of the wires. I could have just bought replacement sockets like these but my impatience with shipping time got the best of me, so I decided to rewire them myself. Using a drill bit slightly larger than the rivet hole, I drilled the rivet head until it was released. Below, you can see the ring from the rivet left on the drill bit. The rivet itself was pushed through, and the socket came apart in two halves.
I snipped the old wires off the bulb contacts and soldered new 1 1/2′ long 18AWG wires to them. The center contact is hot or live and gets a black wire, while the side contact is neutral and gets a white wire.
With the new wires on, I needed a nut and bolt to replace the rivet and hold the socket together. I sifted through many drawers and containers of nuts and bolts until I found a set that fit. I put a dab of thread lock to secure the nut onto the bolt.